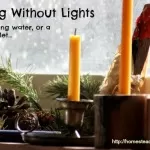
While I never expected to be living electricity-free for quite so long, there are certain benefits that come with unplugging. For one, we get to experience the warm glow of lighting with beeswax candles each and every night! After purchasing way too many cheap (or not so cheap) candles, we finally took the plunge into candle making. Here are some step-by-step photos of the process of making beeswax candles, in hopes that it inspires you to make your own!

What Equipment Do I Need to Make Beeswax Candles?
The first step in making beeswax candles is gathering the supplies you need. The basics are:
- Wick (suitable for tapers, like this one)
- Dipping Racks (that look like this one)
- Dipping Vat (like this)
- Beeswax (source from a local apiary, or buy here)
- Some old pots to melt the wax
- Scissors
We used a taper dipping rack that can make six candles at a time. We purchased this taper dipping rack through Glory Bee and borrowed several more from our neighbors. (I recommend Glory Bee for candle making supplies because they are pros, and you’ll find their prices reasonable, but I also provided Amazon links above where you can find similar supplies.)
Making Beeswax Candles
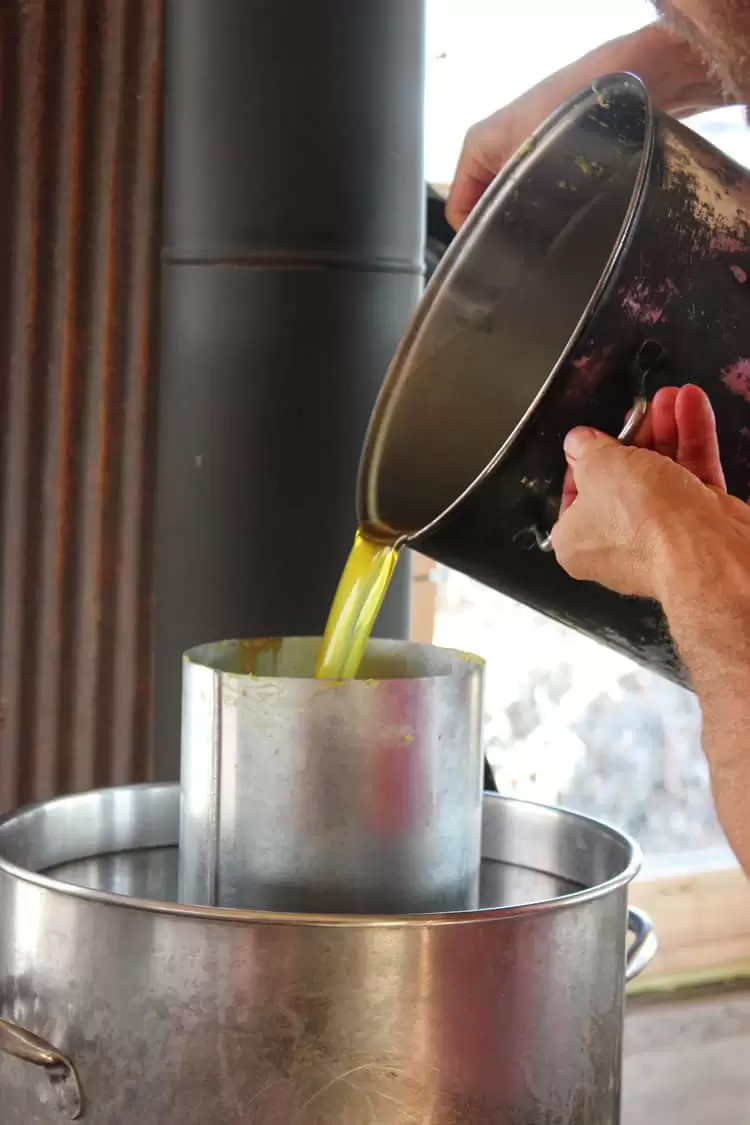
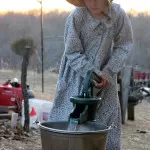
The photo above shows me pouring melted beeswax into the dipping vat, which sits inside of a larger pot of simmering water. We did this on our woodstove, although you could also do it on your range.
Once the dipping vat was full, we returned the beeswax pot to the stove to keep warm, topping off the vat as needed. We purchased the beeswax from a local honey farm, although we hope our beehives will produce ample beeswax in the coming years.
While the beeswax melted, we prepared the dippers by winding the wick from top to bottom.
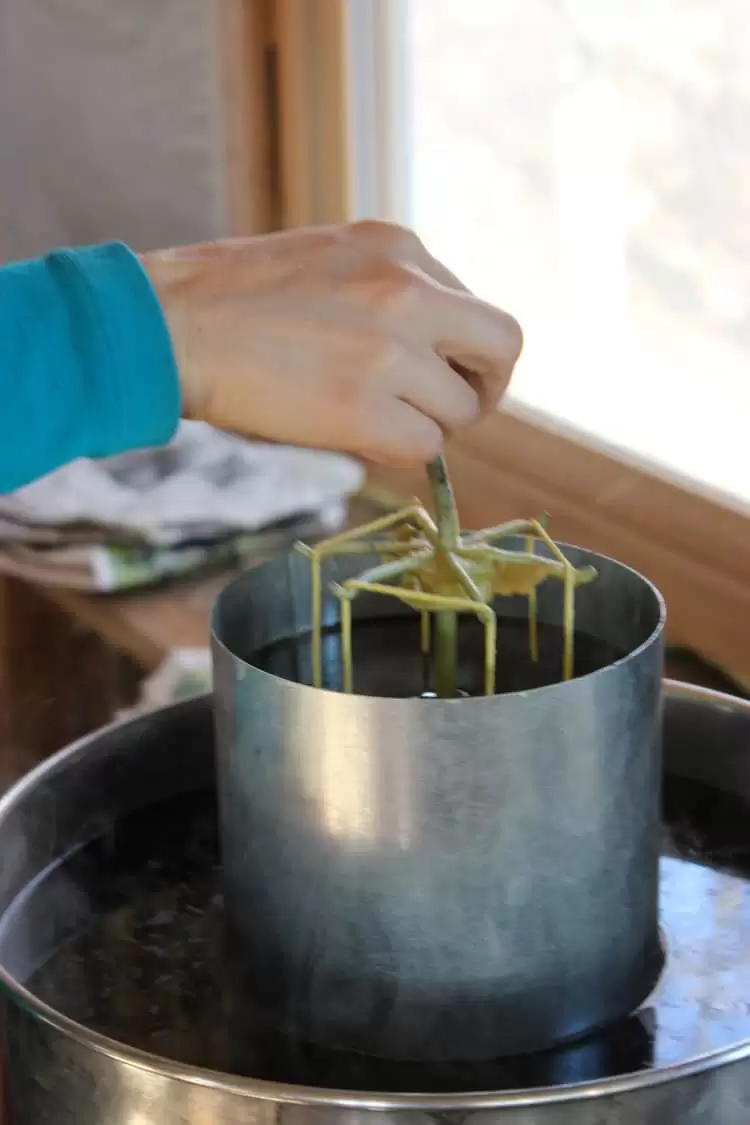
Beginning the dipping process! With the borrowed dipping racks, were able to make 12 sets of 6 candles at a time. By the time we finished dipping the last, we were ready to begin again with the first.
This job went much more smoothly with two people working together. We kept the entire area between the woodstove and the drying rack covered in newspaper to minimize mess.
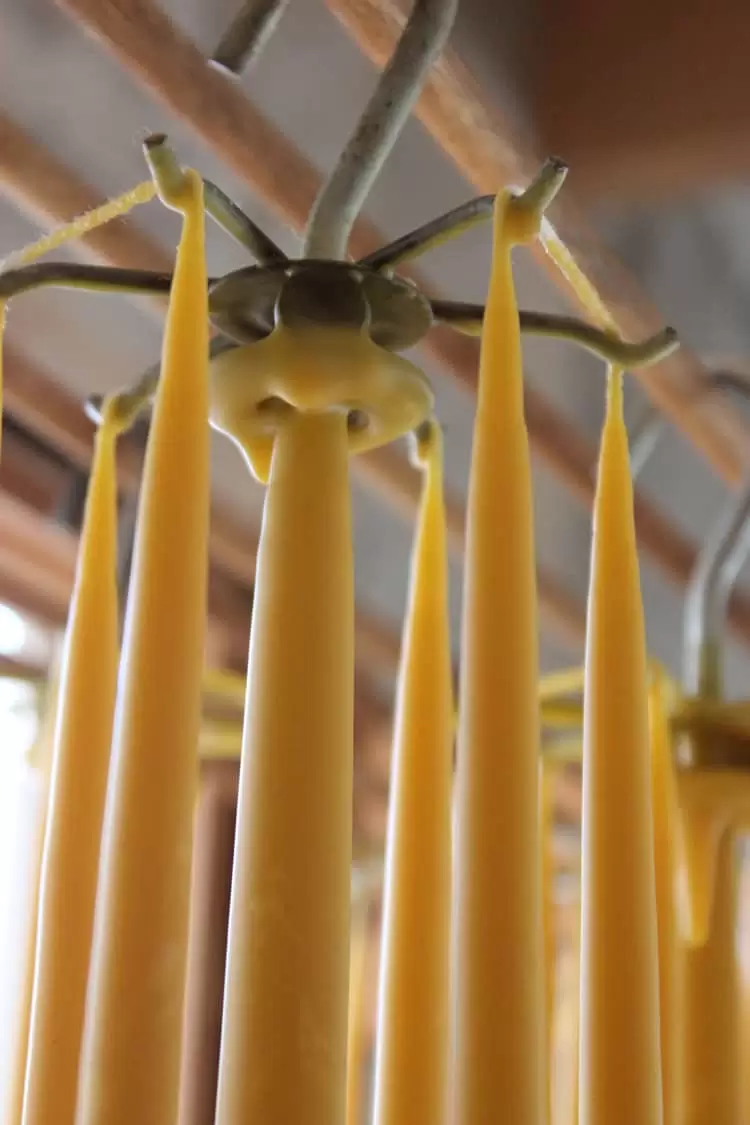
Getting thicker! We were warned that there is a “golden zone” between candles that are too thin, and thus burn too quickly, and candles that are too thick. We ended up doing 10 dips total, which has resulted in beautifully burning candles that don’t drip a bit!
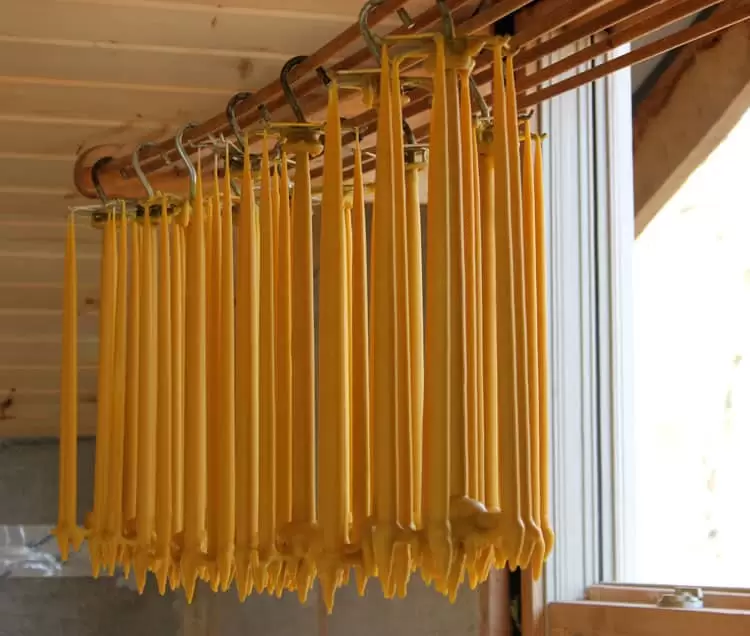
After the candles finished drying, we cut them free from the dipping racks so we could reuse them for another round of candlemaking!
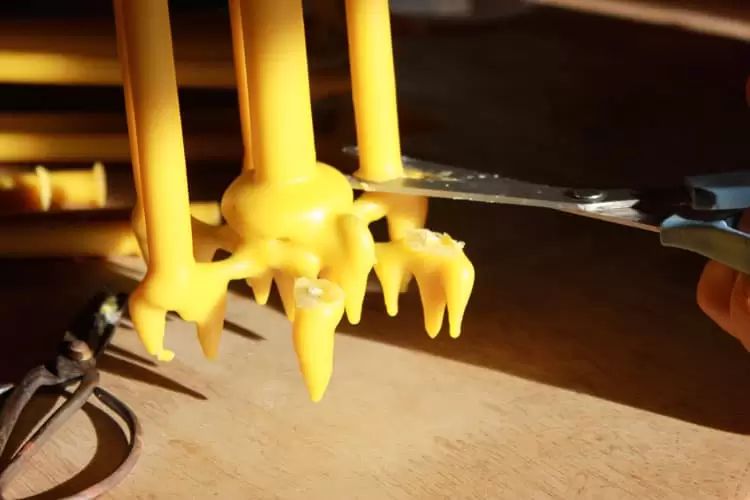
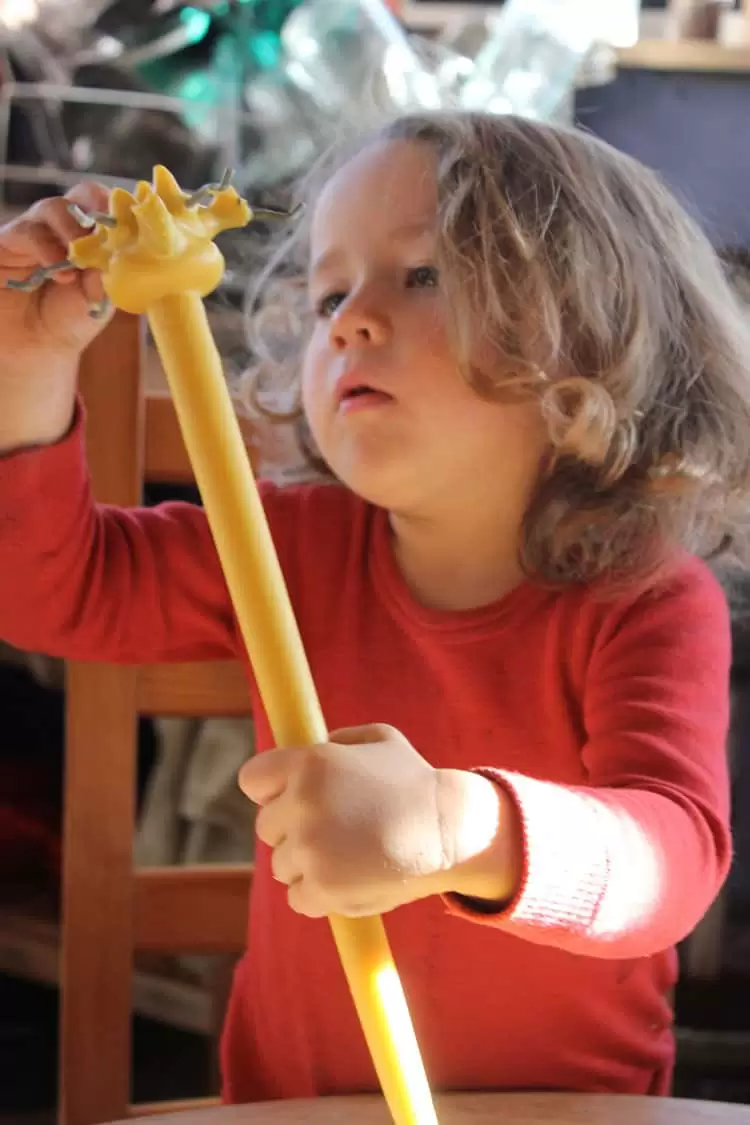
The kids really enjoyed pulling the excess wax off the dippers!

Voila! 72 beautiful, sweet-smelling candles to light our home.
If you’re using beeswax candles to light your home, or want to maximize their light when faced with a power outage, read my article for tips on lighting with beeswax candles.


do you know somewhere else I can purchase a quality dipping rack and the thing you hung the candle on to dry? neither the store you used nor amazon seem to have the dipping rack. thank you!
Unfortunately I don’t have a resource to share, since I bought the stainless steel dipper many years ago. The wooden rack is something my husband made. It was just wooden dowels. A clothes drying rack would work just as well!
where can I find the dippers?
Thank you
Here is an online example. I have not purchased from them so don’t know the quality: https://www.dadant.com/catalog/m03123-dipping-rack?gclid=Cj0KCQjwz6ShBhCMARIsAH9A0qWuOFmPY0SbDifzDZgNTj3zNKjzoJsZirbygaEadqjWVzGVjNwEBEUaAjXjEALw_wcB
This is a great post. I recently started making my own scented candles and found a really great 444 Soy blend, but my roommate has a source for beeswax that I am dying to try. Does beeswax have a good throw? I was wondering about scenting them or just making unscented votives.
Honestly, I love the natural scent of beeswax so much that I’ve never even thought about scenting them!! They are so sweet with just the pure beeswax.
What type of trying or wick did you use? An if you could not get out to order or go into town. What would you use in the wilderness? ?
Hi Gretchen, Thanks for your questions. It’s been a while since I’ve made candles, so I’d have to hunt down our supplies to find the wick diameter.
In a wilderness setting, when you had no supplies, I bet you could improvise a candle wick with some thin rope or even a cotton t-shirt, perhaps braided tightly.
I starting to culture a bee corner which I got some ideas from your other bee’s article post.. I hope this will be productive this year.looking forward for a busy 2016…
by the way, what as the best remedy for bee sting..LOL
I tend to make a baking soda paste (just water and baking soda) for stings.
Great post. I was looking for interesting activities to do in a new relationship and this is definetly on the list. That contraption is incredible. Ive made and sold candles before but never quite loved workinv with soy wax. I cant wait to go back to my roots and work with beeswax.
Hi!
So I wanted to ask — how much wax did you use for those 72? Do you have an article/post on how to melt the beeswax beforehand, or how warm to keep the water so it stays the right temp while dipping? And do you recommend a particular place to get wax, if you don’t have a neighbor close who keeps bees?
Sorry for so many questions, but this is something I’d really like to try, and I want to make sure I do the best I can.
Thanks, and I love your site!
Hi Stacy,
You can purchase wax through places like Glory Bee, and other candle-making suppliers. Unfortunately, I don’t know exactly how much wax we had, but we were using a 5 or 6 quart pot filled with beeswax, and we had to top it off once or twice. We kept the beeswax in a pot of water, and kept the whole thing on our wood stove while we worked.
Since I feel like I’m still learning, I’d love to recommend this post: http://joybileefarm.com/the-secret-to-perfect-tapers-making-bees-wax-candles-part-2/
Good luck!
Teri
So beautiful! Who knew there was such thing as a dipper? That makes life easier. 🙂
Yes, it is a great tool! And especially when you have many dippers to make the work go fast.
LOVED this post! If you have a good relationship with your beekeeper, you may be able to convince them to give you some raw honeycomb so that you can render the wax yourself. It’s a neat thing to do. We’ve done this a couple of times with my husband’s uncle (a beekeeper) . He *hates* the process of rendering the wax because it’s a little messy and time consuming. So he made a deal with us that we could keep whatever wax we rendered ourselves because it saved him the trouble of having to do it! It saved us money and saved him some hassle.
We do keep bees, but have never had enough beeswax to render our own in large amounts. We do howeever have a local honey company that sells their wax and it is really beautiful. I feel fortunate to be able to purchase it locally!
I really want to try making some hand dipped candles too, but what I really want to know is where did you find that cool thing you used for dipping several candles at one time! Also…where to you find a tall enough container to be able to hand dip 10-12 inch tapers? Love the thought of having my own handmade beeswax candles!! :-))
We bought our candle making supplies through Glory Bee. We also borrowed a few extra dippers from our neighbors.
Here is the dipping rack: http://www.glorybee.com/shop/Taper-Dipping-Rack.html
And the dipping vat: http://www.glorybee.com/shop/Metal-Dipping-Vat-6-x-15.html
Obviously, it was a bit of an investment for us to purchase these materials. But we made about 150 taper candles last year and plan to do the same this year, and used them for lighting for about 9 months of the year!
Thank you SO MUCH for the links!! :-))
Thank you for the links! How long does each candle last?
And that you for inspiring us 🙂
Thank YOU, Deborah! When we were burning candles as our primary light source, we’d switch in a new one every 3-4 days. Of course that was in the dead of winter when we were burning candles for 4-5 hours!
You make it sound so simple, but as a professional chandler, I know you definitely did not provide enough details. Selecting the correct size and shape of wicking is absolutely key to any candle that is made. If you are going to post about making candles, you need to include this crucial information so that others can be successful.
Hi Rhonda, it’s true that I did not provide enough details for someone to follow my post to the letter and make their own candles. That was never my intention. I was hoping to inspire others to look into candle making by showing the beauty of the process. But I’m always happy to refer people to other blogs for exact information.
Just beautiful! And now that I have my first beeswax covering wrap, which smells divine, I can only imagine how lovely your home must smell!
Yes, they do sound wonderful!
Hi Teri: beautiful images, great article! Where did you source the wax, and did you have to prep it in any way besides melting it? Thanks again!
Hi Misty, we sourced the beeswax from a local honey producer. We were able to get a big block with no shipping, which was great.
The only thing with heating the wax is that if you are using candle stubs along with fresh wax, you would strain it before dipping. Otherwise, just be very careful heating wax on a flame, since it can catch fire.
Thanks for your note!
I would LOVE to see a picture of the whole taper candle frame to know how to string the wick!
Yes, that is a good idea. Next time we make candles, I will be sure to take some more detailed photos of the process and can explain it a bit more clearly!
What did you use as wicks? Is that cotton clothes line cording? Thank you, this is a great post. You made it look so easy.
Hi Lisa,
No, it’s actually cotton wick that is made specifically for candles. We purchased it from a candle making supply store – Glory Bee.
Thanks for reading!
Those are beautiful! I would love to have the equipment available to make my own!
They are so fun to make Sarah! I was just mentioning to Lindsey, below, that you can also tie on a weight to a piece of wick to mimic the dipper. But it’s more time consuming!
What?!? Let us all take a minute to bask in this post of awesomeness. One of the best things about learning how to do stuff ourselves is this richness of information that flows forth – from neighbors, online friends, people we’ve met at the market, etc. Each person comes with their own bit of knowledge and spreads it around. Like you spreading this to me – I had no idea such a thing as those dippers even existed! I don’t know how I thought people did large batches of candles – probably naively thought they did it one by one. I just spent a couple of minutes looking at the contraption and now? I wanna make all our own candles.
How pretty to have them hanging all along the rafters like that – and I bet they smell amazing!
Thanks for the new info!!
🙂
Thanks for such a wonderfully uplifting comment!
We are total newbies to this whole candle making process, but luckily we have several electricity-free friends in the area, so we were able to watch the process.
I’ve also seen people tie on a weight to the bottom of a wick and dip candles individually, but if you really want to get into candle-making, these dippers are fantastic! We ordered ours from Glory Bee.
Lovely product, but be careful in close quarters, soot ain’t good for anyone. Here is an article on candle safety as regards indoor air quality: http://www.naturallifemagazine.com/9906/candles.htm
I love that magazine. I will check out the article. Thanks!
Me too! They smell so great!
oh, neat! I am going to have to try this! thanks fo rhte pretty pics!
What a cool activity – – and very useful, too!!!
Oh, and by the way, Everett is a total cutie pie.
Thank you!
We have made beeswax candles often but use an old mold which works pretty well. These are just beautiful though and you don’t have the aggravation of trying to ease them out of the mold!
This way was easy, but I love votives too.