This post may contain affiliate links. Please read my Privacy Policy & Disclosures for more information.
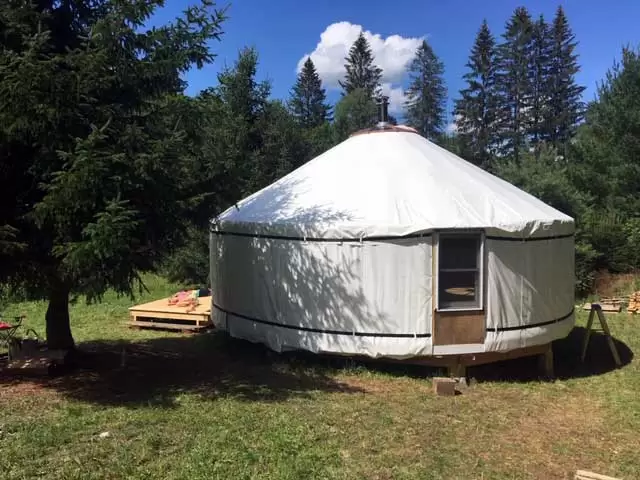
After months of dreaming and preparing, a group of friends joined us in building a 25 foot yurt for our off the grid homestead!
It must have been 6 or so years ago that we met Ken of Two Girls Farm and Yurts. At the time we were living in Missouri and neither planning to live in a yurt, nor to move across the country. Still, his craft and business still registered in my brain as exciting, like one of those moments that the Universe tells you to file away for future pondering.
Once we moved to Vermont, we started meeting people who live in one of Ken and his wife, Adriane’s, beautiful yurts, and the idea of commissioning one for our homestead began to take root.
Ken and Adriane handcraft yurts for year-round, New England living out of sustainably harvested round wood saplings, which gives the yurt a unique, rustically elegant interior. They are truly creations of beauty and the fact that they are made from local materials, by real humans that we have met, made supporting this small business a no-brainer.
(Throughout this article, I use the term “build a yurt” for ease and clarity – it’s better than writing about a yurt erection! – but I want to be clear that Ken and Adriane and the rest of the team at Two Girls Yurts did the work of building the yurt. We (meaning mostly my builder husband, Brian) built the yurt platform, flooring, deck, and the window and door jambs, and harvested a few roof rafters. The yurt itself was delivered to us in pieces, ready to raise.)
Why Did We Decide to Build a Yurt?
The short answer is that it’s incredibly difficult to make real building progress when you live off site. (We’re currently living about 25 minutes away from the land we’re buying in Central Vermont.) Building the yurt enables us to move onto the land as soon as possible so we can spend time working on our house, outbuildings, and gardens.
We anticipate that we will live in the yurt for at least one year, but more likely two.
I spent a winter living in a yurt in Oregon, so I have some idea of what we’re getting into. Having lived as a family of four in a 350 sq ft tiny house for 6 years, I feel grateful for the almost 500 sq ft that this yurt will provide!!
Why Did We Build a Yurt, Rather Than a Small Cabin?
As for our choice to build a yurt rather than a small cabin (or a basement apartment, garage apartment, etc.), that was a more nuanced decision.
Many argue that a yurt is more expensive than building a stick frame cabin/apartment, and we do not disagree. However, the work that goes into building that kind of structure is significant. Having already built an off the grid tiny house, we are well aware of the “Builder Fatigue” that sets in. We plan to build a modest-size, handcrafted home on this property, and want to save plenty of building energy and excitement for the actual house.
Here are some additional factors that tipped the scale toward purchasing a yurt:
1) As owner-builders, we also had to consider opportunity costs. Meaning, every hour that my husband and I spend building a structure is a lost hour of working a wage-earning job.
The advantage of the yurt is that we were able to erect it (with a crew of volunteers) in one day, minimizing the time we needed to take off from paid work.
2) Because the yurt went up so quickly, we can move out of our rental much sooner. In a little over one year of not paying rent, this yurt will have paid for itself.
3) Once we build our house, we can choose to either keep the yurt and use it as a guest space, teenage kid hangout area, AirBnB, homesteading retreat center, yoga studio, etc., or we could sell the yurt. In this area, yurts have a high resale value, so if we decided to sell the yurt, we’d recoup some of our investment.
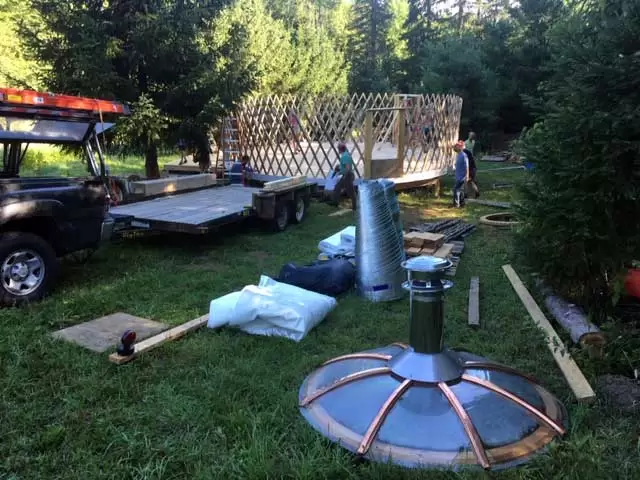
Building the Yurt Platform
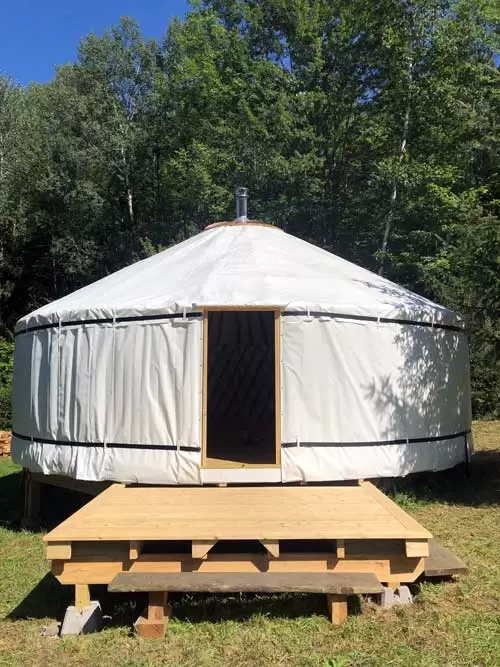
We purchased the largest sized yurt that Two Girls Yurts offers – a 25 foot diameter, with 6 foot walls (their standard is 5 ft). We added the insulation package, but decided to install glass/screen windows and provide our own door.
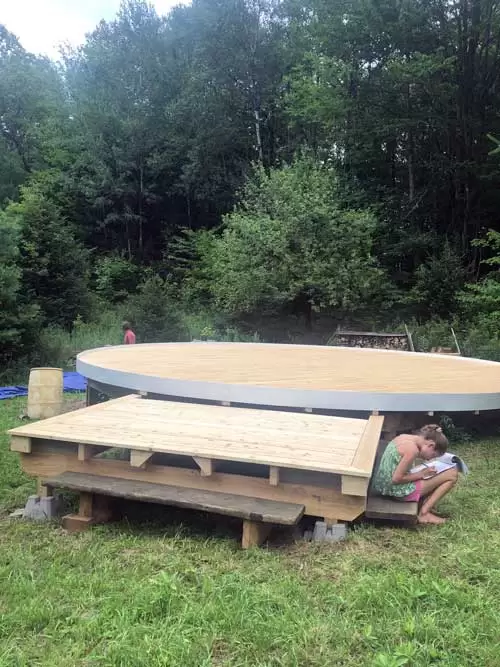
To prepare for the yurt raising, we needed to build the window and door jambs and also build a platform that was exactly 25 feet in diameter, with stairs leading up to the platform. We added a 8’x10’ cedar deck.
After some consultation with Ken, we decided to use locally milled (green) hemlock for the yurt platform, and locally milled, dry, 2×6” tongue and groove hemlock for the flooring.
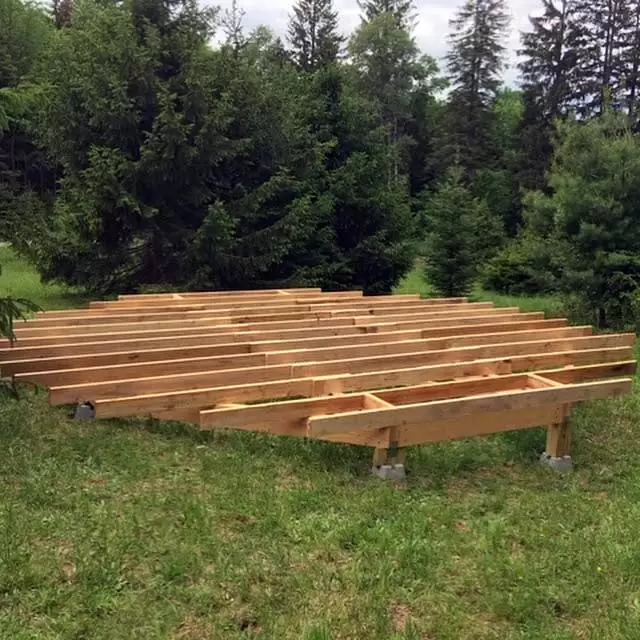
We did not add insulation under the flooring, nor did we use a subfloor; the tongue and groove sat directly on the floor joists. Again, this was after consultation with Ken, who advised that if the yurt is cold, it’s probably not because you don’t have adequate floor insulation, it’s because your fire went out.
The Yurt Raising Day!
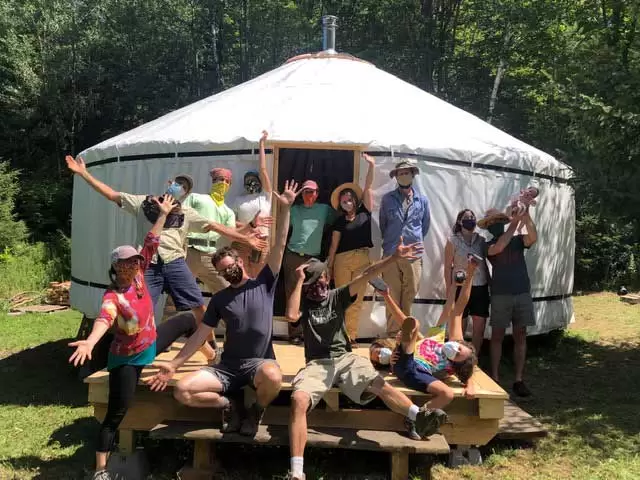
We placed our deposit back in March, so we had lots of time to dream (and worry!) about raising day. We sent out emails to dozens of friends and community members, and were so happy to get an extremely competent, enthusiastic crew of 15 or so helpers. We’re so grateful for their help!
Two Girls Yurts does an amazing job of preparing the yurt pieces so they come together easily and with minimal tools. For instance, they use bolts, velcro, snaps, and cleats to secure various parts of the yurt. Adriane is the epitome of a grounded, quietly confident leader, and she kept the crew working efficiently, but with no sense of rushing. Still, the process was much quicker than I imagined; we started at 8:30am ish, and were finished before 2pm!
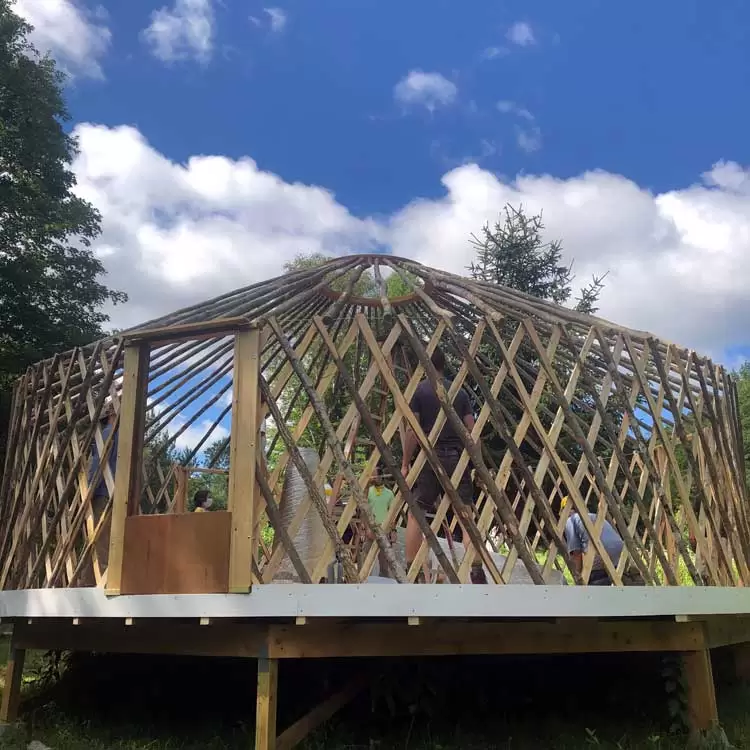
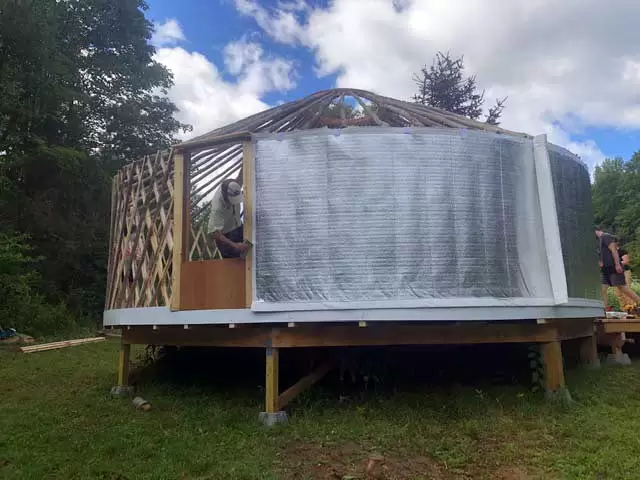
The process started by stretching the lattice walls into place and securing them into the door and window jambs and the yurt “skirt.” The lattice came assembled, accordion-style, in three pieces to accommodate our two hard windows and one door. A cable was run along the top of the lattice walls, onto which the rafters sit.
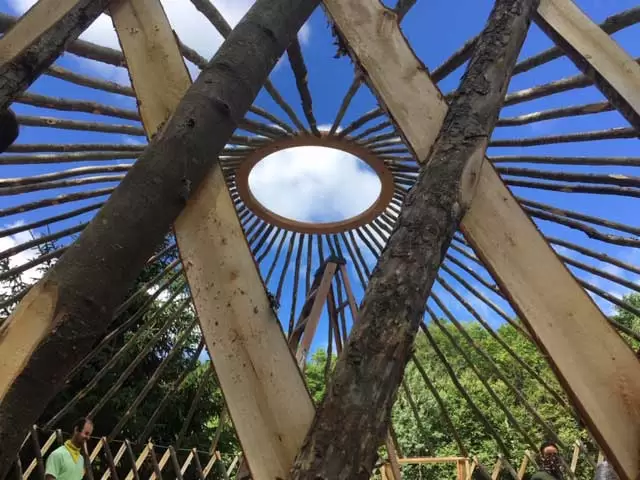
The rafters were inserted into a round ring and then secured onto the cable. Two by two, the rafters went into place, until we ended up with a complete frame!
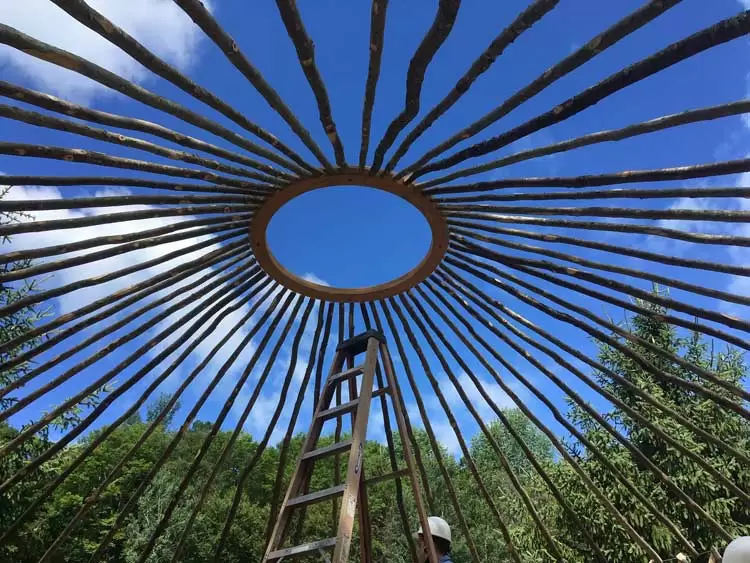
Here you can see the round wood sapling roof rafters and yurt lattice of the yurt. One really fun bonus of this construction is that we get to practice our tree identification skills! (So far we know we have beech, cherry, hop hornbeam, and some sugar maple lattice.)
Once the yurt frame was assembled, it was time to add the various layers of cloth, insulation, and heavy-duty yurt covering. These were attached by velcro, snaps, staples, and/or cleats.
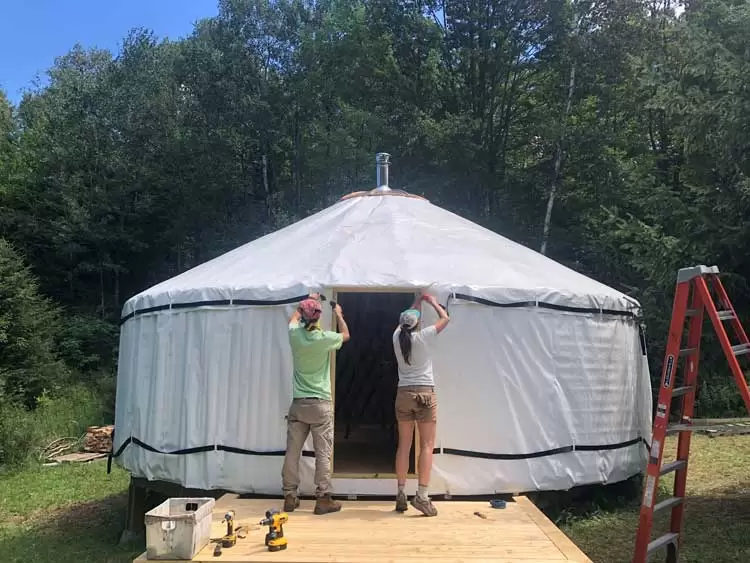
One advantage of having such a large crew was that we could split up into groups to tackle different tasks, and everyone could find something that fit their interest and skill level. Our kids were able to participate in many aspects of the yurt raising because the only power tools used were impact drivers and screw guns.
The work ahead of us is to finish some details – window and door trim, sanding and finishing the floors – and then to design and install the interior details. We’re planning to use lofts for the kids’ sleeping and play areas. I imagine we will get a good head start on the construction before our move-in date, but will likely have to continue customizing the yurt interior while living there.
If you live in the New England area and are interested in yurt living, I highly recommend checking out Two Girls Yurts. And if you have any questions, leave them in the comments, or DM me on Instagram @homestead_honey.
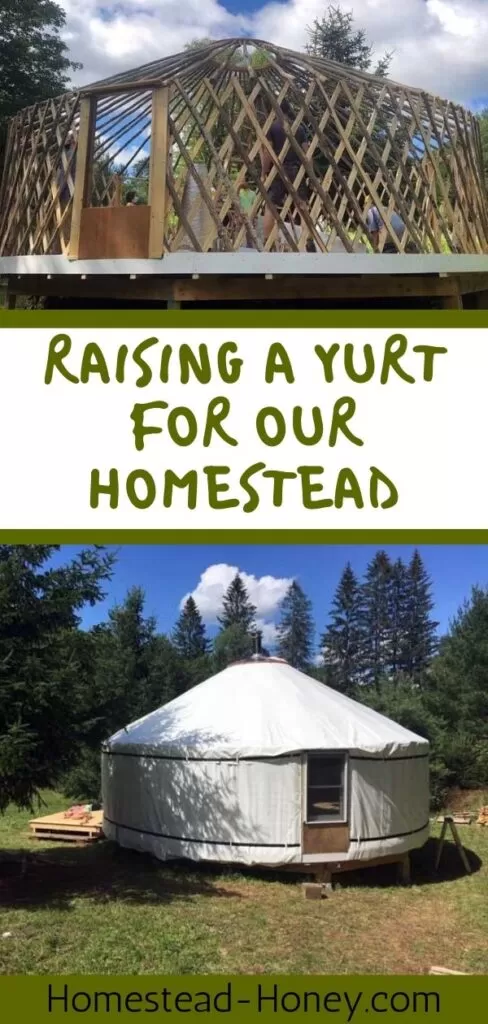
Pin it for Later:


Hi Teri,
My wife and I are very interested in doing the same thing- buying raw land in VT, establishing a well with manual pump, and building a yurt on the land. The land we are interested in already has well and septic design/permit filed and signed by the town. We would plan on getting a permit for a composting toilet, and using a manual outdoor shower. With that said, we wouldn’t plan on actually establishing a septic system until years down the road, for financial reasons. With your experience, does the state only issue building permits if you have a physical septic system installed? Or is all they require a permit to be filed? Do people come around your land checking for that? We would be deeming the yurt and land as our full time residence. Any info on your experience with this would be great.
Thanks,
Ian
Hi Ian,
Building permits in Vermont are issued by the town in which you live. While towns seem to have various zoning regulations, one thing that seems consistent is that you need a septic design and permit filed with the state before a building permit is issued. So on that front, you have a good head start. My experience so far is that “officials” have come to our property only to inspect the land for our Curb Cut permit (to build a driveway), and to assess the new infrastructure for tax purposes. Of course I can’t advise you to live without a septic system 😉 but I do not know of any final inspection process.
Hope that helps!
Teri
Hi, I am also planning to buy a 25′ yurt with 6′ wall from the Two Girls Yurts. I’ve been looking for pictures of the interior of a yurt that size to get a feel for how big it will be and if it is possible to built a loft platform for another bedroom (especially if it has a central stove). Would it be possible for you to provide pictures of the interior for reference? Or is there another post that has interior pics? Thanks!
I will email you some photos, Nina. You can also find some interior photos on my Instagram @homestead_honey
Hi,
We are looking at buying land in VT and would like to be off grid (no elec, running water, septic).
Could you give us any advice and or share your experience of working with the municipality or towns?
Thanks!
Hi Ben, This is generalized information and may not be true for every town in Vermont, but my understanding is that while towns may have different zoning requirements (i.e what buildings can be built where), there is a statewide requirement to have a septic system in place for year-round living. Our town, for instance, required a septic permit and design filed before we got issued a building permit. This is, of course, with an eye toward protecting the waterways of Vermont. As for no electricity, running water, that doesn’t seem to be an issue. We are completely off grid for power and water. We have a well with a manual pump. Some people develop springs. You’d want to talk with locals about how often any spring/creek/well dries up. Practically speaking, you want to be thinking about the fact that it’s frozen here for many months 🙂 Hope that helps, Teri
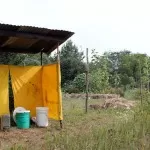
May I ask if you have not yet plumbed your land, what type of bathroom did you set up and also what type of electricity if any? Did you happen to get the solar kit from twogirlsyurt?
Thank you!!
We do not have a bathroom set up in the yurt, but we carry water in from our well. For solar, we bought our equipment from Backwoods solar. Two Girls Yurt’s system would have not been sufficient for our electricity needs.
We have some interest in putting a yurt on our property. Where would one start to look for a used yurt??
You could try Craigslist or FB marketplace. I know there were a few used yurts on Craigslist when we were thinking about getting one, but they were not as good of a bargain as you’d think! There used to be a used yurt website but I’m not sure if it’s still updated. Good luck!
Hey there! I would love some info about the yurt installation if you wouldn’t mind.
1.) Any permits required for erecting a yurt?
2.) Are the water and electricity hookups easily set up? We want to assemble and hook up to our parents house for utilities and don’t really know what that would look like.
3.) How did you get people to come out and volunteer to help y’all build the yurt??
Hi Jessah,
We did have to submit a building permit for our yurt, just like we would have to for any structure we build on our land, but this is highly variable depending on where you live. When we were in Missouri, we never had to submit a single permit.
The water and electricity is really hard to speak to, as it depends on where you live. Where we live, we would have to bury water lines deep to avoid freeze damage. So it makes it tricky to plumb the yurt. Ours is not plumbed.
For the build, we were led by one of the owners of the yurt company, so all we needed was a crew of willing volunteers – they didn’t have to be builders. We asked everyone we knew if they’d be available to help, and fed them very well!! fortunately, we have a wonderful community that was willing to assist us, but also, you’d be surprised at how much interest a yurt generates. Most of the people we asked were excited to participate because it’s a very cool project! Also, it ended up only taking 5 or so hours, so it wasn’t a huge time commitment. And of course, we will reciprocate whenever possible!
Way to go. Maybe one day I can come visit?..