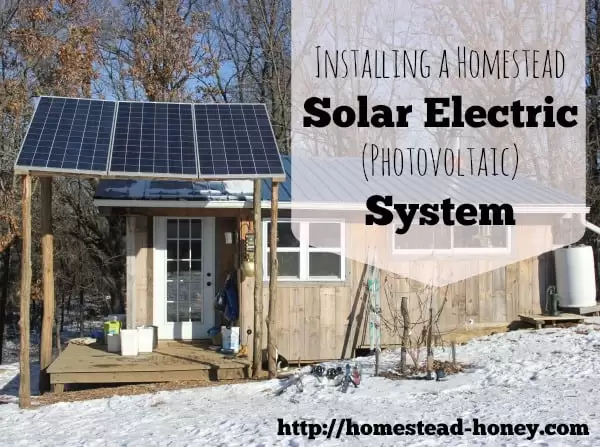
A few months ago, I wrote about the process of selecting a solar electric system for our tiny house. We ordered our equipment from Backwoods Solar in late summer, and the installation was complete by early November, with my husband Brian doing all of the work himself. Today, I welcome Brian to tell about the process of installing our homestead photovoltaic system.
* * * * * * * *
We chose to install an off-grid photovoltaic system for our electrical needs, partly because we wanted an alternative to the coal-fired electricity of NE Missouri, but also because our home site is about ¼ mile from the road, and the cost of running power lines and poles would have been comparable to what we paid for our system. We had gotten a few different recommendations for Backwoods Solar, a small company based in Idaho, and decided to buy our system through them. We couldn’t be happier with our experience. They tailored our system to our needs and budget, and were always available for phone consultation and trouble-shooting along the way, which made all the difference for me. I have a limited amount of electrical wiring experience, but with their advice, some puzzling over manuals, and some help from my father-in-law, I was able to safely install this system. I would encourage anyone with similar skills to try it, or consider hiring an electrician to help you install it.
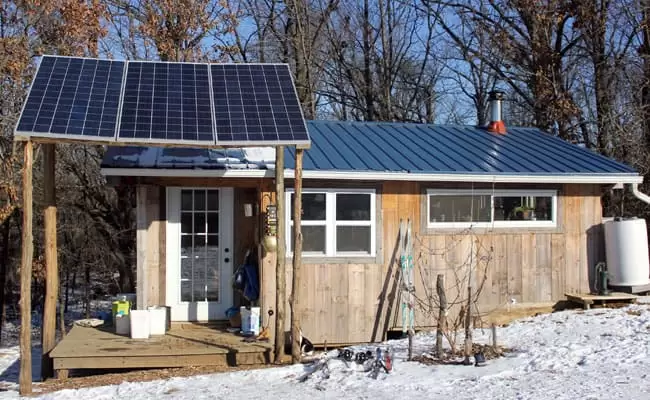
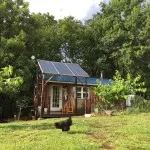
Here are our three PV panels or modules, mounted in front of our house on a homemade support structure. I chose to mount them here instead of on the roof because I didn’t want to put any holes in our roof or buy a mounting rack. Also, there was a certain amount of shade on the roof from nearby trees which I wanted to avoid. I set the permanent angle of the modules to a recommended average between the summer and winter angles.
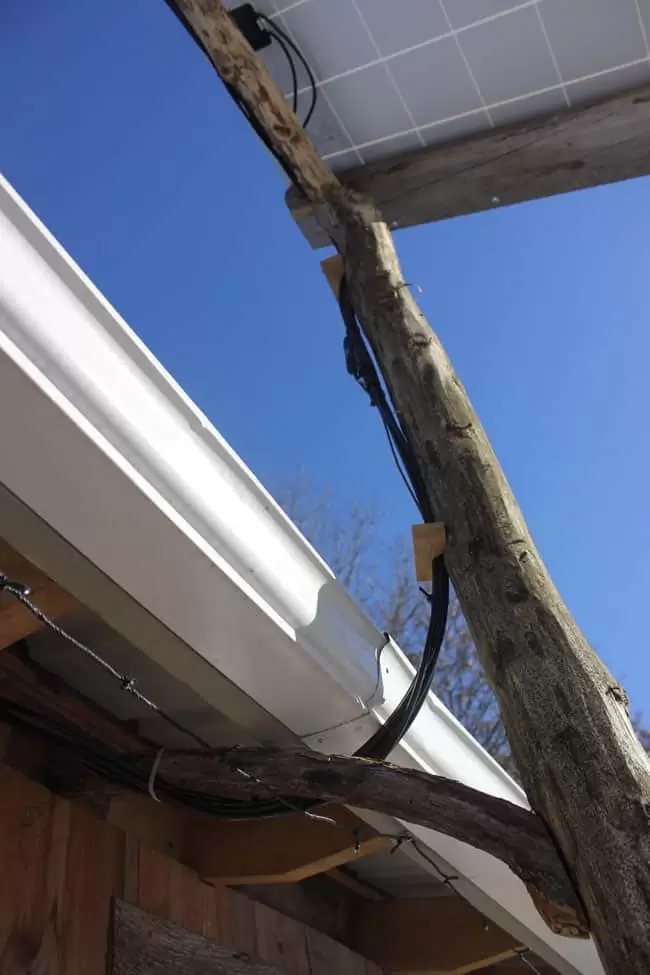
Positive and negative and ground wires come out of each module and feed down to our combiner box that I mounted under the eave of our porch. Each module goes through a breaker and combines and from there, a single positive wire and negative wire lead into the house.
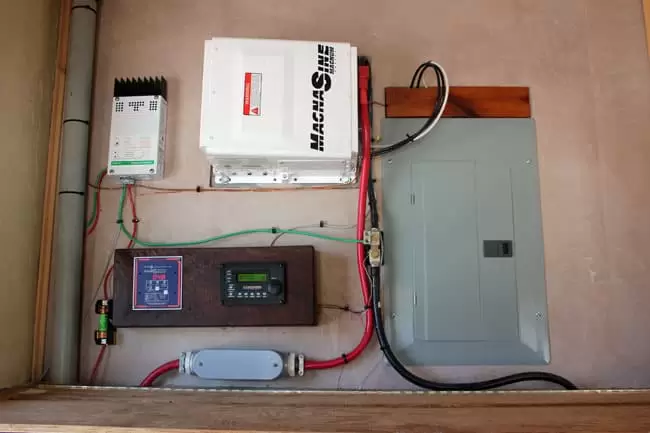
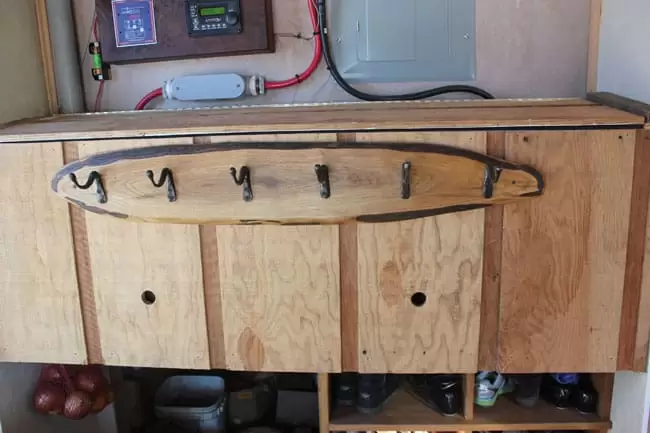
Here is where the heart of our PV system resides, on the wall of our mud room. If we had a bigger house, I would’ve installed it in the cellar or utility room, a bit more removed from our living quarters, but in a tiny house, you have to make do with the space you have! At the upper left is the charge controller, which makes sure the batteries are charged properly, and not overcharged once they are full. From the battery box, heavy duty positive and negative wires lead up to the inverter, the large white box in the upper center, which takes the DC current and converts it to AC, and from there it feeds into the gray breaker box which is what any house connected to the grid would have. Last but not least, the small digital display to the lower left is our Trimetric battery meter, which allows for very accurate monitoring of battery status. The battery bank is one of the most expensive parts of your system, and one of the most vulnerable to damage if proper charging is not maintained, so this is a critical component.

Inside the battery box, you can see our eight 6-volt Trojan batteries, connected in two parallel 24-volt strings. The box has a well-sealed hatch and a pipe leading outside the building, to safely vent off explosive hydrogen gas which is produced during charging.
* * * * * * *
Thank you, Brian! I should note that we’ve been using our photovoltaic system for almost two months now, and it is truly amazing! Although I love the simplicity of living without electricity, it is so nice to be able to easily use a blender, or a laptop, or simply to turn on lights to see while you’re reading! We recently plugged in an energy efficient chest freezer, and will watch the system to see how it handles that extra load!


My question is how do you find corrosion of the terminals over time? Do you use any anti-corrosion product and which terminals give trouble ?
We are not using any anti-corrosion product, but my husband is closely monitoring the batteries for any signs of corrosion. We have had our solar electric system for almost two years now, with no signs of corrosion. Wiping up any spills, checking the connections, etc. are all part of monthly maintenance, which also includes equalizing the batteries.
I found your post interesting, but you didn’t mention your panel size. Are they 15 watt or 100 watt. What is the total output of your panels and how well do they keep the batteries charged? I have a single 100 watt panel I want to use on my older motorhome.
Hi Jack, We have three 290 watt solar panels and 8 batteries. The system works really well, about 95% of the time. You can read more about it in this article: https://homestead-honey.com/2016/02/22/living-off-grid-with-solar-electricity/
We are just now looking into solar, so thanks for sharing your setup. I may have missed this in the reading (I apologize if I did), but could you give me a rough estimate of what your system cost? Thanks,
Cheryl
It was just over $5,000, which included shipping charges.
Teri & Brian,
I saw your post on Backwoods Solar website. We bought our solar system from them about 4 years ago and it is still working great. We are also completely off grid and have progressed through stages over the past few years; such as running water, domestic hot water through our wood cook stove, a flushing toilet was a great addition. We used a compost toilet for a few years, but the toilet took electricity to work correctly. Glad to see another person enjoying the off grid live style. We have finally worked out the time to start blogging as well. You can check our progress if interested at our word press, https://livingasustainabledream.wordpress.com
Thanks for saying hello!
Your wood cookstove set up looks amazing! And that sink! Wow!
I’ve enjoyed reading your articles on solar. We just got our solar system set up and it is cheaper than hooking up to the local power system so we are already saving money! I just love that sunshine which we don’t get much of here in the winter so we’ll see how well the batteries charge. We only bought a 2000 watt inverter and already feel it may be too small but we can always upgrade later. How many watts is your inverter? We paid someone to set ours up but after seeing how simple the system is, I think we could have done it ourselves. Have you thought of solar hot water heater? That is the next addition to our system.
Hi Lori, Thanks for your message! We bought a heftier inverter than we needed, thinking that it might be helpful if we ever wanted to add panels in the future. Our inverter is 4000 watts.
I think we’d enjoy a solar hot water heater, but first we have to tackle running water!
Hi Teri and Brian
Thanks for all the info. I am very interested in knowing how the usage of your freezer is working out?
What make,model and size is it?
Do you continue to use the other solar capturing panels you had before?
Thanks
Kate
Hi Kate,
The freezer is working out fantastic! I believe this is a Kenmore freezer, but really, we just googled “energy efficient chest freezer” and picked one that had an Energy Star rating, and was on sale. We have PLENTY of juice for the freezer, in fact, we’ve been joking that we should purchase a small fridge! We haven’t been using the other solar panels, but we may end up using them to power a small water pump.
Teri , thanks for the info on the chest freeze. I thought I’d have to buy a ‘solar-specific’ unit that is very expensive.
What size is I? 7 cubic feet? 10?
We realized that our system would power an energy efficient freezer just fine, but it really would depend on how robust the system was.
I’d tell you what size it is, but I’m on vacation!
Thanks for this article. Solar power is in our two year plan for the farm so I saved it for future reference. The pictures are really helpful to a solar newbie like me.
I’m so glad! I would have loved to see photos and a blog post about this before we got started too. It seems so overwhelming at first!
This is our next major step, solar to get off the grid! Just completed our water system. I look forward to going over this with my husband. 🙂
I’ll have to check out your water system, as that’s our next step!
I’ve been thinking a lot about what all could be powered by DC, so to bypass the inverter and increase power efficiency. LED lights were mentioned above, but I think also we could easily have DC powered laptop and phone chargers (after all, the adapters are just converting from AC back to DC). I’ve also seen DC powered deep freezers and refrigerators, which would be great to have for food preservation on an off-grid homestead. Basically, all the absolute essentials could be powered by DC as far as I can tell.
I was surprised to see so much battery capacity on your setup – do you ever come close to using it at night? What is your total capacity, and could you get by with less by limiting your evening power usage? I’d think that would be easy for you, since you recently had no power at all. Just curious, since I would like to do the same in our home eventually. Perhaps you have it for things like a fridge, which you wouldn’t want to lose power even for short durations…
Yes, it’s really true that you can get so many of your appliances in DC. We were just recently thinking about a DC powered ceiling fan.
Our system is way more robust than what we are needing right now (since we only have a few lights, a deep freezer, and an occasional computer plugged in). But we bought a bigger system planning for the future. And also to make sure that the freezer was always functional (if needed, we could always plug in the generator). But I think it will be a bit of an experiment, and we may find out that we have way more capacity than we need.
Hi,
Great article. I have been running a home made solar system for almost 2 years now. I run all my PC and electric items from a 2500 watt inverter, and that works great. As for the lights in my home they are all 12 volt DC LED’s. I used the 15 foot rope LED’s that I got off Amazon for $8.00 each. They come with a 3M adhesive backing so you can stick them where you like or find another means of attachment. If you need them shorter than the 15 foot they can be cut with a pair of scissors to your needed length. Best of all they draw almost nothing from my batteries. I have a digital volt meter to monitor my system, and when I turn on 1 of the 7 rope lights my meter might jump from 13.7 to 13.5. I also use 12 volt DC incandescent bulbs ranging in wattage from 25, 50, 75, and 100. These draw more power from the batteries, but provide a different type of light. Just some of my thoughts on what I did to get out from under the power company. I still have an electric bill, but I’ve seen it go from over $150.00 per month to an average of $30.00 to $40.00. Good luck with all you do there at the tiny house.
Lucian Dean
It’s great to hear from others who have been doing this for a while! We have been slowly adding LED lights, and it’s true – they draw almost nothing. As long as the sun is shining, our battery bank remains at almost 100%, even with the freezer running. We’ll see what it looks like when it’s cloudy!