If you are new to canning, this beginner’s canning equipment guide from Jenny at The Domestic Wildflower will help you get started canning in a way that is easy, fun, and safe! Jenny is going to walk you through her essential list of canning equipment and supplies so you can finish out the harvest season with a collection of home-preserved goods! (But don’t worry – you don’t have to spend a fortune – many of these items can be found at thrift stores or yard sales!). Welcome, Jenny!
Your homestead is likely producing all kinds of bounty, and preserving that harvest is such a satisfying, fun, and important step. I’m Jenny and I teach beginners how to can over on my blog, The Domestic Wildflower, and I especially love showing busy people how canning can fit into a modern, busy life.
I don’t can all day long, and I don’t can hundreds of pounds of produce at a time (though I certainly could, as could you!). I do preserve in small to medium batches using quick recipes that are safely using up-to-date science so there’s no need to worry about getting sick or if you’re doing it right.
What Do I Need to Get Started Canning?
The first hurdle many people experience when considering how to get started canning is the equipment. You might remember those giant black speckled pots that Grandma used and you can use them too but I sure don’t. They take forever to come to a boil and I don’t have that kind of time. This post will share my no-frills equipment checklist and you can hop over next door to my blog to print off a copy if you’re so inclined, but you’ll soon see that you probably have almost everything you need already to get started canning today!
No-frills Canning Equipment List
LARGE POT for processing jars. This can be a pot you might boil an artichoke in or cook stew in, and it can be lower quality. You can use the black and white speckled enamel canning pots (especially if that’s what you own already, of course!) but understand that those take a very long time to come to a boil and every subsequent batch will then also take a long time (20-30 minutes each minimum, not counting the processing time). The enamel canning pots are also very heavy when they are full of water. I’d opt for the smaller pot that you already own. It only needs to be a few inches taller than the jars you’ll be canning.
WIRE RACK or SILICONE TRIVET that fits in bottom of large pot. This silicone trivet is the magic little $10 tool that makes a regular sized, multi-use pot work. The trivet prevents the jars from rattling around on the bottom of the pot and breaking. The wire rack is used if you use the traditional speckled pot and likely be sold together. Again, the regular pot plus silicone trivet is far more user friendly and multipurpose.
MEDIUM/LARGE HEAVY-BOTTOMED POT for cooking preserves. This is the pot you’ll use to cook your jam or salsa or whatever you are canning.
JAR LIFTER for lifting jars from boiling water. This might be the one thing you don’t already own but you definitely need it. They are often sold in a kit with the funnel.
FUNNEL for pouring food into jars. This prevents the food from thwarting the seal’s creation.
NEW LIDS for your canned goods. You can reuse, thrift, borrow, etc every other item EXCEPT the lids. You must use brand new lids every time. You can reuse them for storing dry goods (or tiny toys or crayons!) but you can’t use them twice for canning.
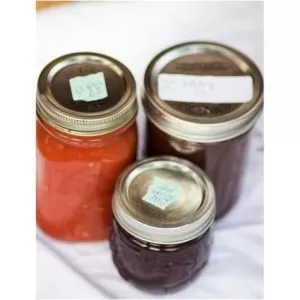
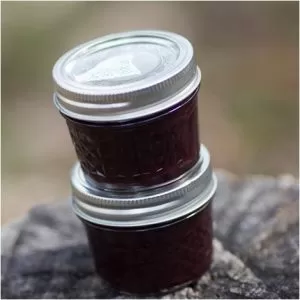
CANNING JARS in your choice of sizes. If I had to choose one size jar, it would be the wide mouth pint. They are easy to clean, you can drink out of them, you can freeze in them (the new ones have a freeze mark on them!), and they are appropriate for many types of recipes. The second size I’d recommend is the wide mouth half pint.
If you are brand new to canning, I have two tips, that might seem conflicting in terms of jars, but hear me out. Be easy going and accept what friends will give you free or what you can get for cheap because the most important thing is you get started.
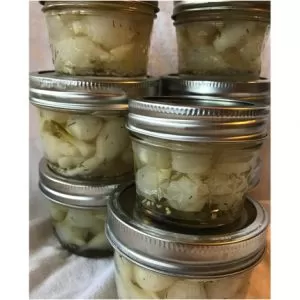
But, if you are buying new, consider choosing all wide mouth jars. They stack nicely and are easier to clean, so much so that I’ve considered liquidating all my regular mouth jars and going ALL wide mouth. That would seem crazy to some I know, but having all one kind of opening would be pretty handy.
RINGS in regular or wide-mouth, depending on jar. Sometimes you’ll get used jars that have no rings so you’ll need to buy rings separately. Other times, you’ll get used rings and if they are dented or rusted they’ll need to be replaced. Used rings are fine, but they need to be in good condition.
And that’s it! With those basic tools you can start canning! It is my favorite when newbies dive in and I’ve created a low commitment visual guide to help you preserve your harvest today! The Canning Jump Start Guide shows you:
- Where to put each pot on the stove
- How to adjust your processing times for altitude
- How to best plan your canning season
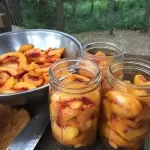
- A pantry checklist so you never are without the correct dry goods when you end up with a flat of tomatoes or bushel of apples to preserve
- Four of my best beginner friendly recipes,
- And perhaps best of all, the steam canning fact sheet & equipment list
Steam canning is fairly new to the canning world, approved by the USDA in 2015, and those steam canners make canning FAST. They save over 20 minutes per batch! The fact sheet and accompanying equipment list round out the Canning Jump Start Guide so you are able to choose which method will be fastest and easiest for you, you’ll have a great set of easy recipes at the ready, and you’ll be able to preserve your harvest with the step by step guide.
I can’t wait to see all the jars of home-preserved goodness you put up!

About Jenny:
Jenny is a mom of 2 littles, an English teacher, and she blogs about homemade food & craft at www.thedomesticwildflower.com If she had to can just one thing for the rest of her life, it would be tomato sauce.
Pin it for Later:


Leave a Reply