So, you’ve started your lacto-fermentation journey, perhaps making some naturally fermented pickles or sauerkraut. You’ve mastered the basics, but have some questions about how to make your ferments really successful. Look no further! Here are a few time-tested tips and tricks for successful fermentation that result in amazingly tasty ferments.
Our top three tips for successful fermentation:
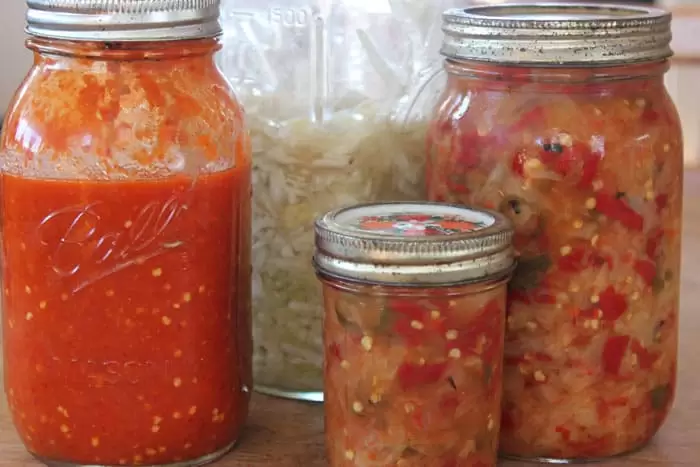
1) Don’t be afraid to add more brine to sauerkrauts
Most sauerkraut recipes will tell you to add salt, pound the cabbage, and let the cabbage’s natural juice form a brine. It’s critical in all vegetable ferments that the ferment be always submerged beneath this brine to prevent molds from forming on the vegetable. But sometimes the natural juices of the cabbage will not sufficiently cover it, no matter how much you pound and press (for instance, an older head of cabbage may contain less moisture).
So, even though recipes might not mention adding brine to sauerkrauts, don’t hesitate to do so if the liquid isn’t sufficient to cover. This holds true at the beginning, or even days or weeks into the fermentation process. A simple brine, like you would use to make lacto-fermented pickles, is easily made by dissolving 3 tablespoons salt into one quart of water. Mix up a batch of this brine, and use it to top off the sauerkraut or other vegetable ferment. We talk more about this in our post on how to store and care for vegetable ferments.
2) Try glass jars instead of crocks
Ceramic crocks are beautiful, right? And they are rather useful for preserving large quantities of vegetables. In fact, to attain the best volume to surface area ratio, the larger your ferment the better. Some early Japanese wooden miso barrels were hundreds of gallons!
But you do not need a crock to start fermenting! In fact, we’ve found that glass jars work much better for family-scale fermentation.
Here’s why: Our family ferments as we go. We make pickles every few days as the cucumbers ripen in the garden, or make one batch of sauerkraut from early season cabbages, and then another batch or two later in the season. The scale is small – quarts or half-gallons or gallons at a time – so glass canning jars work great, are easy to come by, and are inexpensive.
Fermenting in glass jars also allows you to watch your ferments progress. We like to keep them on our kitchen counter, where we enjoy their colorful beauty, and also have a constant visual reminder to check daily for taste and surface mold.
3) Avoid surface mold
Almost every fermentation guide will talk about surface mold, and sooner or later you will find surface mold on one of your home ferments. White surface molds are quite harmless, and most guides will tell you to simply scrape off the mold and carry on. Sometimes, if parts of the vegetables were sticking up out of the brine, they will need to be scraped away and discarded as well. Repack the ferment, top off with some more brine, and return to the counter, fridge, or cellar. No harm done.
But some surface molds are paper thin and dusty, and the minute you try to scrape them off, they seem to dissolve into the ferment, making it almost impossible to remove. And if it happens enough, it can even affect the taste of your ferment.
We’ve found that it’s best to avoid the mold growth in the first place. Here’s how:
- Check on your ferment daily. We have a daily routine of checking on actively-fermenting batches (which is easy since they are on our counter in glass jars!). For pickles, we simply tighten the loose lid, invert them to douse all interior surfaces with the brine, then re-loosen the lids. For sauerkraut type ferments, we open the lid, push down the vegetables with our fingers or a spoon (be sure to taste it!), then loosely re-cap it.
- Keep ferments completely submerged under a brine. We’ve been experimenting with the Fermentools Starter Kit, which comes with a glass weight that works well to keep vegetables under liquid. We’ve also used smooth clean stones to that purpose.
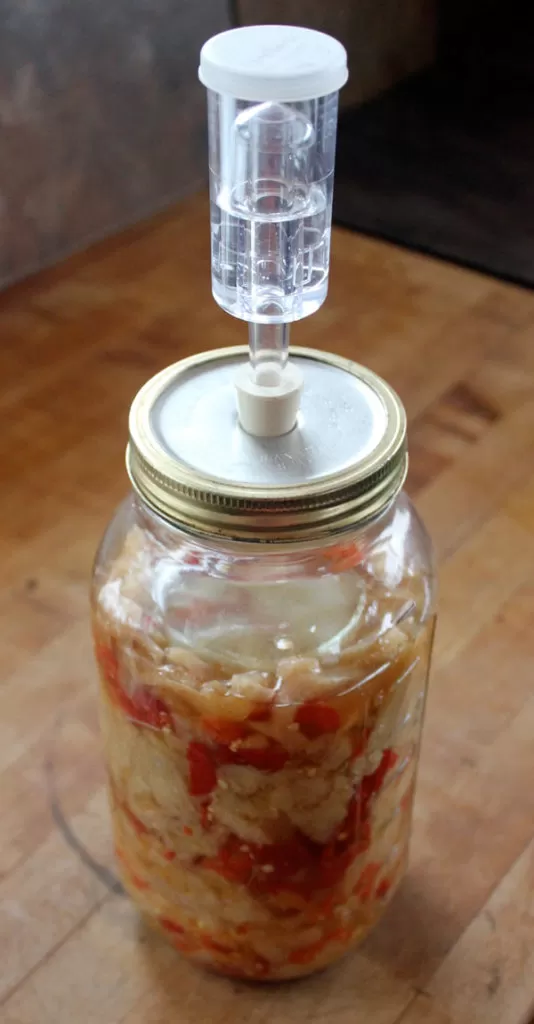
- Consider an airlock. Fermentools’ lid is fit with an air-lock that helps keep mold spores out of your ferments. You can tighten the lid and the air-lock will release build up gasses but prevent any air from getting back in. Easy as can be!
Perhaps the greatest tip for home fermentation is don’t be afraid to experiment! Get some veggies, grab a copy of a simple fermentation book like Wild Fermentation, read this post, check out the many awesome blogs sharing their fermentation stories, and have fun. My guess is that you’ll become hooked on this delicious and simple method of food preservation!
What is your best tip for successful fermentation? Let us know in the comments!
Pin it for Later:





I went to a local wine maker and bought 3 of the air locks and 3 grommets friday afternoon. The air locks were $1.49 each and the grommets were $.59 each. I thought that it was very reasonable and I am anxious to try it this spring. Or I may even buy a head of cabbage and try it this winter.
That’s great! When we run out of sauerkraut, we buy cabbage from the store so we can replenish our supplies – it’s definitely worth the practice!
I want to get started with this and you have really good tips. My question is once the fermentation is done how long does the fruit/veggie last and how do you store it? I have done canning and I made different pickled veggies but they all ended up tasting the same. So I’m hoping this might be the better route to go. Thanks, Katie
Katie,
This blog post will answer most of your questions!! Hope it helps: https://homestead-honey.com/2015/02/16/care-storage-vegetable-ferments/
I have got to try more of this. I had several batches of kombucha go really wrong on me, and since then I’ve been a bit gun shy. The old rule of mold=inedible still lurks in my consciousness. I think that if it grows mold on top then it should all be discarded! Not true, as all my friends who ferment tell me.
I gotta get busy with those active cultures.
I think the important thing is to take notice of what KIND of mold it is. If it’s white and odorless, then go ahead and scrape it off. But if it’s colorful and smells funky, then trust your gut and toss it!